How To Clean Up Oil Spills On Concrete
How to clean up oil spills on concrete? No matter if it’s your pavement, path, driveway or even a garage floor, you want to do as much as you can to try and prolong the look and functionality of all the concrete around your home.
However, concrete can become faded, worn and accumulate a little dirt over time; that’s to be expected. But stains like those dark spots left from an oil leak can be harder to overlook, and bigger spills, whether from a car, container or oil tank, need to be addressed as soon as possible.
But we understand that removing oil stains from concrete isn’t a skill in everyone’s cleaning arsenal. And that’s ok; we can help you with that.

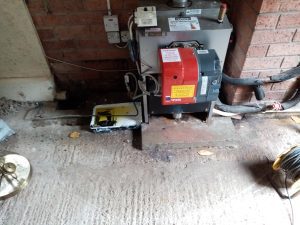
Oil leak from a flexi-hose onto a concrete garage floor
We’ve put together some DIY hacks with household items that you can use to quickly remove oil stains, though we’ll also advise when you need to give us a call to deal with serious oil spill clean ups.
Check out our top tips below.
Must-know tips before you get started
Before you begin tackling an oil spill, there are certain things you need to know first. Whenever dealing with oil, always remember the following:
- If the concrete area you’re dealing with is on an incline, start at the highest point when cleaning and work your way down. This will stop dirty water or debris from flowing over the sections you’ve already cleaned and undoing your hard work
- Be careful of plants or landscaping features nearby when you’re using cleaning products as you want to protect these – it might be worth covering or saturating them with water before cleaning
- Oil is flammable, so you must always be careful and diligent with dealing with spills
- You need to clean or safely discard any materials that you use to clean up the oil, such as brooms, clothes or absorbents (more on this next)
Keep these in mind when dealing with a spill and you can better protect yourself, your landscape and get the job done as effectively as possible.
Gathering the things you might need
How to clean up oil spills on concrete? There are several different options for dealing with an oil spill, at least one of which you’re likely to have in the house already. So, to help you get started, we’ve created a list of the items you might need. These include:
- An absorbent, such as cat litter, baking soda, sawdust, cornstarch or sand, we recommend horticultural peat or compost.
- Cleaning products, such as washing detergent, dish soap or baking soda but in very small amounts
- A stiff broom
- A shovel or dustpan and brush
- Gloves
- A contain or bag for disposing of oil-covered materials.
It’s up to you which absorbent material and cleaning products you use from the list above, but be sure to check you have everything you need to deal with the oil spill as quickly and simply as possible. We’re now going to look at the full process.
1. Soak it up
You want to deal with the spill as quickly as possible, so it is likely to be pooling and wet still when you come to clean it up. Therefore, you need something to soak it up.
The best products to use are those we mentioned above: cat litter, baking soda, sawdust, cornstarch or sand. If all else fails, you can use an absorbent cloth or towel, but this will be ruined, so make sure it’s one you no longer need.
Sprinkle or lay down your chosen materials over the spill as quickly as you can.
2. Leave it to sit
It’s a good idea to leave your chosen material to sit for at least 15 minutes to soak up the spill. This will stop it from soaking into the cement and damaging it beyond repair.
Once it’s been down a while, use your broom, shovel or dustpan and brush to remove the now oil-soaked material. Put this in a bag or container and put this safely out of the way and out of reach.
3. Scrub and rinse……NO!
Please don’t do this at all. If you find that the spillage is too large and unsightly the best course of action is to call in the professionals. The last thing you want to do is mobilise any oil and push it into any drains or worse under your foundations with too much water. Excess water or detergents just breaks oil into smaller and more mobile pieces that can spread.
4. Dispose of oil-covered materials correctly
Now you’ve dealt with the stain and your concrete is clear, you need to dispose of any oil-covered materials correctly.
A quick look online should highlight the nearest oil disposal or recycling facility to you. Some recycling centres will accept hazardous materials but check before simply throwing them in the skip as this can be dangerous, and certainly don’t just pop this in your wheelie bin and forget about it.
Call in the professionals
As we’ve seen, it is possible to deal with oil spills on your own. However, this will largely depend on how much oil has been spilt. If this is a small leak from the car, it is manageable, but if your oil tank has sprung quite a serious leak, it’s unlikely you’ll be able to deal with this on your own.
This is when you need to call in the professionals.
At GAEA we have a huge amount of experience in dealing with large domestic oil spills. So our final piece of advice would be, if you’re ever in doubt or if the oil spill looks unmanageable, call in the professionals and don’t risk your own health and safety.

